Despite the mild disappointment with my first attempt at mead made on the cheap, I decided to give it another try. For my second attempt I decided to duplicate the Alfalfa Orange Cinnamon Mead recipe, but this time paying closer attention to sanitation and preparation. I also decided to document the preparation steps in a little more detail.
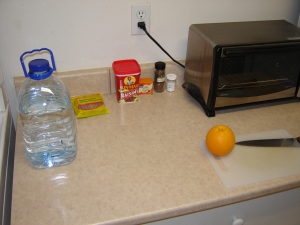
Seen above are some of the ingredients: 4.0 L of spring water, an orange, cinnamon sticks, raisins, ground nutmeg, ground allspice and yeast nutrient.
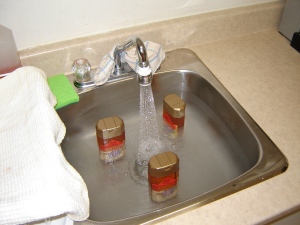
To make it easier to pour, I place the 1.5 kg of honey (Alfalfa honey in this case) in a warm water bath.
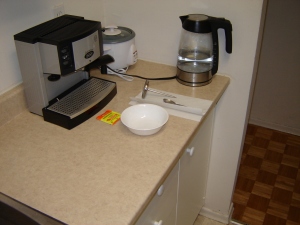
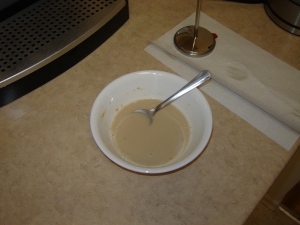
Make sure that you sanitize all the equipment that will come into contact with your must (i.e. honey-water mixture). I use a chlorine-based sanitizer, so I also need to rinse everything *very* thoroughly after using the sanitizer. There are other sanitizers that don’t require as much careful rinsing, so don’t feel that you need to use such a nasty sanitizer, this is what the wine supply store I frequent keeps in stock. In the picture above I have sanitized a bowl and a spoon to re-hydrate the yeast, and a thermometer to measure the temperature of the spring water that I need to heat for re-hydrating the yeast.
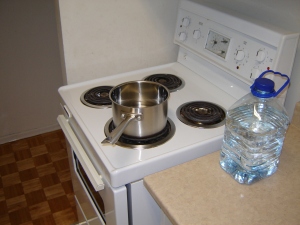
I heat about 0.5 L – 1.0 L of the spring water to the temperature recommended on the yeast package (typically 40 C – 43 C), if the water is too hot you will kill the yeast even before they get to work.
Add 50 mL to 100 mL of the heated spring water to re-hydrate the yeast, then wait 15 minutes before adding the re-hydrated yeast to the must. You can use regular bread yeast (I used Fleischmann’s bread yeast here) for this cheap mead recipe, but wine or champagne yeast is more appropriate (Lavlin D-47 and Lavlin EC-1118 work well).
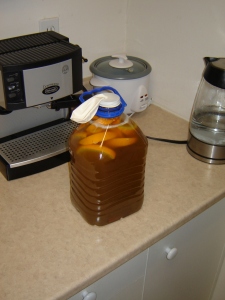
While the yeast was re-hydrating I added the heated honey, orange slices, 1 tsp of yeast nutrient, 1 pinch of ground nutmeg and allspice along with a cinnamon stick to the water jug. Make sure you remove enough water to make room for all the honey and any other ingredients, typically I remove 1/2 of the water from the jug, then I top up what I need after adding all the ingredients. Use the remaining heated spring water to rinse out honey containers, to get all of that delicious honey into the must.
Now shake the jug until the honey is well combined, then add the re-hydrated yeast and shake again for a solid five minutes to oxygenate the mixture. When done, place clean balloon securely over the opening, making sure to perforate the balloon with a needle several times to let the CO2 escape.
That is it, now just wait 1 – 3 months until all the fermentation ceases, and the mead has cleared. You may need to transfer to a clean container at least once during those 3 months. Pouring the mead slowly is a possibility, but for better results use a food grade plastic tubing (well sanitized of course).
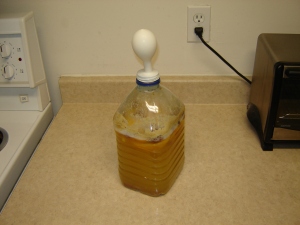
This is what my third batch of mead looks like after a week. I had to remove some of the liquid since it overflowed (twice), so make sure you leave extra space in the container when making a fruit-based mead.
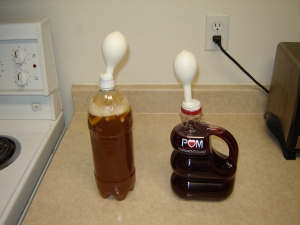
In anticipation of the Alfalfa Orange Cinnamon Mead, I also decided to try some more experimental batches of mead. On the left is a Buckwheat honey (raw honey, purchased locally) and Ginger Mead, and on the right is an Acacia honey and Pomegranate juice concentrate (used in place of spring water) Mead. In both of these recipes I kept it simple, I only used yeast nutrient and the yeast. Though at the time of bottling, I added a small amount of fresh pomegranate juice to the Acacia and Pomegranate Mead to enhance the flavour, which helped immensely!
All three of these batches turned out quite well, a college enjoyed the Buckwheat and Ginger Mead, my fiancee (at the time) enjoyed the Acacia and Pomegranate Mead and everyone loved the Alfalfa Orange Cinnamon Mead. Since everyone enjoyed that mead so much, I suggested that I serve it at the reception of my wedding later that fall. Everyone — including my fiancee — finally agreed, and when the big day arrived last August I served my mead to friends and family alike and everyone was quite pleased.
The kudos I received that day cemented my desire to improve my mead making skills, and to raise my art to ever higher levels. The idea of making this mead making hobby into a business was also born that day, and I have set my sights high.

How much yeast is needed?
A 5 g package of dry yeast is enough for 1 – 5 gallon batches, but I prefer to use 2 x 5 g packages when making 5 gallons of mead. You can use bread yeast (e.g. Fleischmann’s) or wine/champagne yeast (e.g. Lavlin or Red Star), I prefer to use Lavlin EC-1118 or Lavlin D-47 for making my meads. I hope that helps.